How to Install Architectural Shingles (Homeowner’s Guide)
March 1, 2024
So, you’ve decided it’s time to give your roof a makeover with some sleek architectural shingles?
Great choice! Not only do architectural shingles add a touch of style to your home, but they also provide excellent durability and protection against the elements. Ready to upgrade your roof?
Whether you’re a seasoned DIYer or a first-time homeowner looking to take on a new project, installing architectural shingles can be a rewarding endeavor. So, grab your tool belt and let’s dive into this homeowner’s guide on how to install architectural shingles like a pro!
Inside this blog:
- The 8 key steps for installing architectural shingles on your roof
- Tips + tricks under each step to ensure an effective roof shingling
Keep reading so you can learn how to install architectural shingles like a real professional!
🛠️ Preparation is Key
Before you start climbing up that ladder, it’s essential to make sure you’re well-prepared for the task ahead. Here’s a quick rundown of the roofing materials you’ll need:
- Architectural shingles: Purchase enough architectural asphalt roofing shingles to cover your entire roof, plus a little extra for any cuts or mistakes. It’s better to have too many than not enough!
- Underlayment: This provides an extra layer of protection between the asphalt shingles and the roof deck. Invest in high-quality underlayment to ensure long-lasting durability.
- Roofing nails: Make sure you have plenty of nails on hand to secure the shingles in place. Opt for corrosion-resistant nails to prevent rust over time.
- Roofing felt: Some homeowners choose to use roofing felt as an additional barrier against moisture. While not always necessary, roofing felt can provide added peace of mind in areas prone to heavy rainfall.
- Safety gear: Don’t forget your gloves, goggles, and a sturdy pair of shoes with good traction. Safety should always come first when working at heights!
- Tools: You’ll need a hammer, a utility knife, a chalk line, and a nail gun if you have one. Consider investing in quality tools to make the job easier and more efficient.
Step 1: Remove Old Shingles (If Necessary)

If you’re replacing existing shingles, the first step is to remove the old ones. Use a pry bar to lift the shingles away from the roof deck carefully. Be sure to dispose of the old shingles responsibly, and inspect the roof deck for any damage or rot that may need to be repaired before proceeding. This step is crucial for ensuring a smooth and durable new roof.
Step 2: Prepare the Roof Deck
With the old shingles out of the way, it’s time to prepare the roof deck for the new shingles. Start by inspecting the deck for any protruding nails or debris that could interfere with the installation process. If necessary, hammer down any nails and sweep the roof clean. Proper preparation of the roof deck will help ensure the longevity and stability of your new shingles.
Step 3: Install Underlayment and Drip Edge
Before laying down the shingles, it’s essential to install an underlayment to provide an extra layer of protection against moisture. Roll out the underlayment horizontally across the roof deck, overlapping each row by a few inches. Secure the underlayment in place with roofing nails, making sure to leave a gap around the edges for ventilation. Next, install a drip edge along the eaves of the roof to help prevent water from seeping under the shingles.
Step 4: Snap Chalk Lines
To ensure your shingles are installed in straight, neat rows, use a chalk line to snap horizontal guidelines across the roof. Start at the bottom of the roof and work your way up, spacing the lines according to the exposure rating of your shingles.
Step 5: Begin Shingling

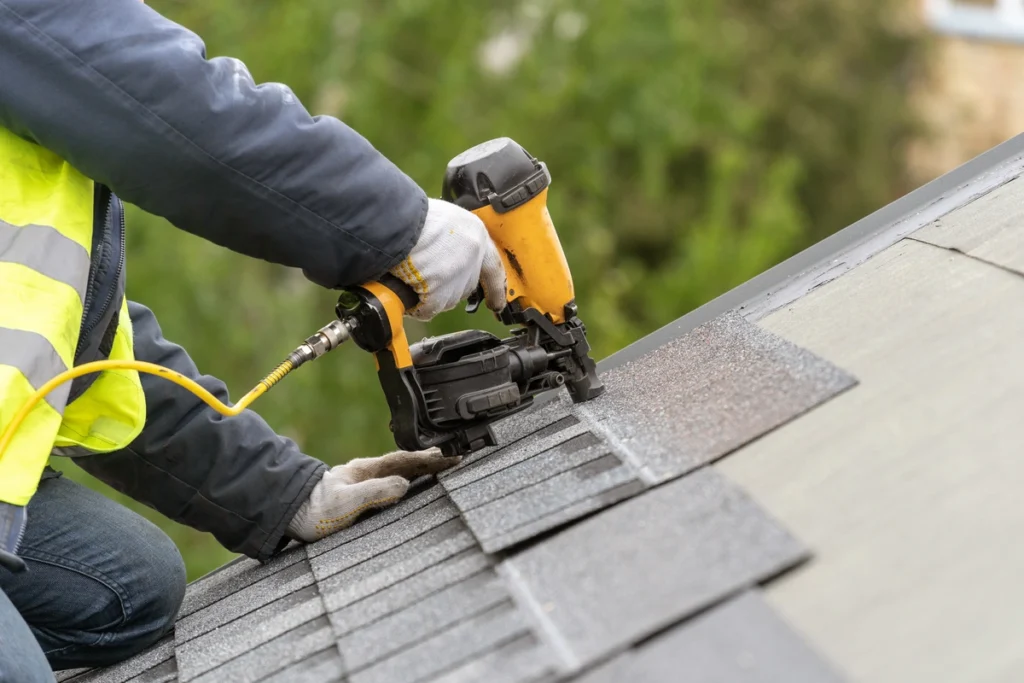
Now for the fun part – it’s time to start laying down the shingles! Begin at the bottom corner of the roof and work your way across and up, following the chalk lines as a guide. Be sure to overlap each row of shingles according to the manufacturer’s instructions, and use roofing nails to secure them in place. As you work, periodically check your progress to ensure the shingles are laying flat and straight.
Step 6: Cut and Fit Shingles as Needed
Chances are, you’ll encounter some obstacles along the way, such as vents, chimneys, or skylights. When you reach these areas, use a utility knife to carefully cut the shingles to size, ensuring a snug fit around the obstacle. Remember to leave a small gap around these features to allow for expansion and contraction.
Step 7: Finish with Ridge Caps
Once you’ve installed the main body of shingles, it’s time to finish off the job with ridge caps. Ridge caps are specially designed shingles that cover the peak of the roof, providing extra protection against wind and water infiltration. To install ridge caps, simply cut the shingles to size and nail them in place along the ridge of the roof, overlapping each cap slightly for maximum coverage.
Step 8: Clean Up and Admire Your Handiwork
With the shingles in place and the ridge caps secured, take a moment to admire your hard work! But before you call it a day, be sure to clean up any leftover materials and debris from the job site. Dispose of any waste responsibly, and give your new roof a final inspection to ensure everything is in tip-top shape.
🏠 Shingle Your Roof Like a True Pro
And there you have it – a step-by-step guide to installing an architectural shingle roof like a pro! With the right tools, materials, and a little bit of elbow grease, you can give your home a fresh new look while protecting it from the elements for years to come.
Contact our X’pert team of roofers at RoofX today for top tier craftsmanship and dedicated customer service. We’ll make sure your home stays standing strom with a solid roof over its head for years to come.


