How to Install Drip Edge On Your Roof – 5 Best Steps
September 7, 2024
Are you a homeowner looking to improve the durability and aesthetics of your roof? Installing drip edge is a simple yet essential upgrade that can protect your home from water damage and give your roof a polished finish. In this comprehensive guide, we’ll walk you through everything you need to know about installing drip edge on your roof. From understanding what drip edge is to the step-by-step process of installation, we’ve got you covered:
- What is Drip Edge?
- Benefits of Installing Drip Edge
- Tools and Materials Needed
- How to Install Drip Edge on Your Roof in 5 Steps
- Common Mistakes to Avoid
- Maintenance Tips for Drip Edge
- Frequently Asked Questions
🤔 What is Drip Edge?
Drip edge is a metal flashing that is installed along the edges of your roof. Its primary function is to direct water away from the fascia boards and into the gutters, ensuring proper drainage. This small but vital component plays a crucial role in protecting your home from water damage, as it prevents water from seeping into the underlying roofing materials and helps maintain the integrity of the roof.
Importance of Drip Edge for Your Home’s Structure
Drip edge is essential for several reasons. First, it helps to prevent water infiltration that can lead to rot and damage in the fascia, soffits, and even the underlying structure of your home. This is particularly important in areas where heavy rainfall or snow accumulation occurs, as proper water management can significantly reduce the risk of leaks and structural issues.
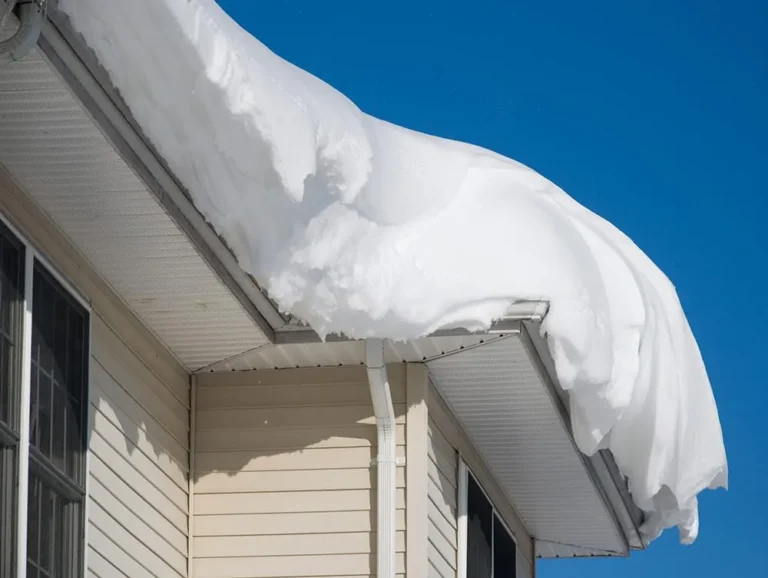
Additionally, drip edge assists in minimizing the chances of ice dam formation in colder climates. When water backs up behind ice dams, it can seep under shingles and lead to interior water damage. Thus, having a properly installed drip edge can enhance the overall lifespan of your roofing system and protect your home’s investment.
Signs of Damaged Drip Edge
Recognizing the signs of damaged drip edge is crucial in maintaining your home’s roofing system. Here are some indicators to watch for:
- Visible Rust or Corrosion: If you notice rust or corrosion on the metal flashing, it may be compromised and less effective at directing water.
- Water Damage: Signs such as water stains on the fascia, walls, or ceilings inside your home can indicate that water is not being properly channeled away.
- Missing Sections: If you can see that sections of the drip edge are missing or have been displaced, it’s essential to address this immediately.
- Shingle Damage: Curling, lifting, or missing shingles near the edges of your roof may suggest that the drip edge is not functioning properly.
- Pooling Water: If you notice water pooling near the foundation of your home after rainfall, it could indicate that the drip edge is not directing water to the gutters effectively.
Addressing these issues promptly can help maintain the integrity of your home and extend the lifespan of your roofing system. Regular inspections and maintenance of drip edge can prevent costly repairs down the line.
✅ Benefits of Installing Drip Edge
Installing a drip edge is crucial as it helps direct water away from the roof and protects the underlying structure from water damage. It also prevents erosion and promotes proper drainage, ensuring the longevity of your roofing system.
Protection from Water Damage
One of the primary benefits of drip edge is its ability to prevent water damage. By directing water away from the fascia and into the gutters, it helps keep your roof and the underlying structure dry and intact.
Enhances Roof Durability
Installing drip edge can significantly extend the lifespan of your roof. By preventing water intrusion and directing water flow properly, it reduces the risk of rotting and deterioration of roofing materials.
Improves Aesthetics
A properly installed drip edge gives your roof a clean and finished look. It hides the rough edges of shingles and provides a neat outline to your roof, enhancing the overall curb appeal of your home.
🧰 Tools and Materials Needed
Before starting your drip edge installation, gather the following tools and materials:
- Measuring tape
- Tin snips or metal shears
- Hammer
- Roofing nails
- Pry bar
- Ladder
- Safety gloves and goggles
- Chalk line
- Sealant
🛠️ How to Install Drip Edge on Your Roof in 5 Steps
Installing drip edge on your roof is crucial for directing water away from the fascia and preventing potential water damage. It helps protect your home’s structure and enhances the durability of your roofing system.
1. Preparing Your Roof for Drip Edge Installation
Inspect Your Roof
Before installing the drip edge, inspect your roof for any damage or issues that need to be addressed. Ensure that the surface is clean and free of debris.
Measure and Cut the Drip Edge
Using a measuring tape, measure the length of your roof edges. Cut the drip edge to the appropriate lengths using tin snips or metal shears. Make sure to wear safety gloves and goggles while cutting.
Chalk Line Marking
Use a chalk line to mark the position where the drip edge will be installed. This will ensure that the drip edge is aligned correctly and provides uniform coverage.
2. Start with the Eaves
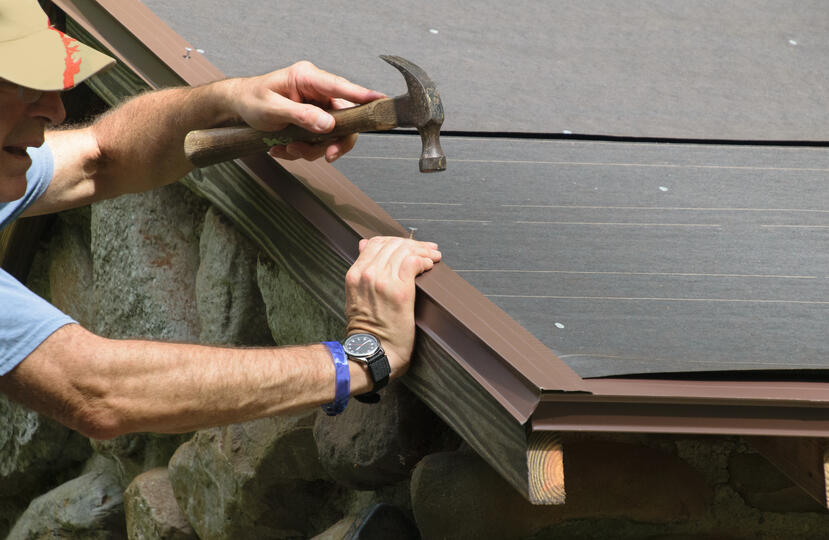
Begin by installing the drip edge along the eaves of the roof, which is crucial for directing water away from the fascia and preventing damage. Position the drip edge so that it extends slightly over the edge of the roof for optimal drainage. Use roofing nails to secure it, spacing them about 12 inches apart to ensure stability and support.
3. Installing Along the Rake
Next, proceed to install the drip edge along the rake edges of the roof, which are the sloped sides. Ensure that the drip edge overlaps the previously installed eave drip edge by about 2 inches to create a continuous barrier against water. Nail it in place, maintaining consistent spacing between the nails to enhance durability and effectiveness.
4. Seal the Joints
After installation, apply a bead of sealant along the joints where the drip edge pieces overlap. This step is essential for creating a watertight seal that prevents water from seeping through any gaps, safeguarding your roof and structure from moisture damage over time.
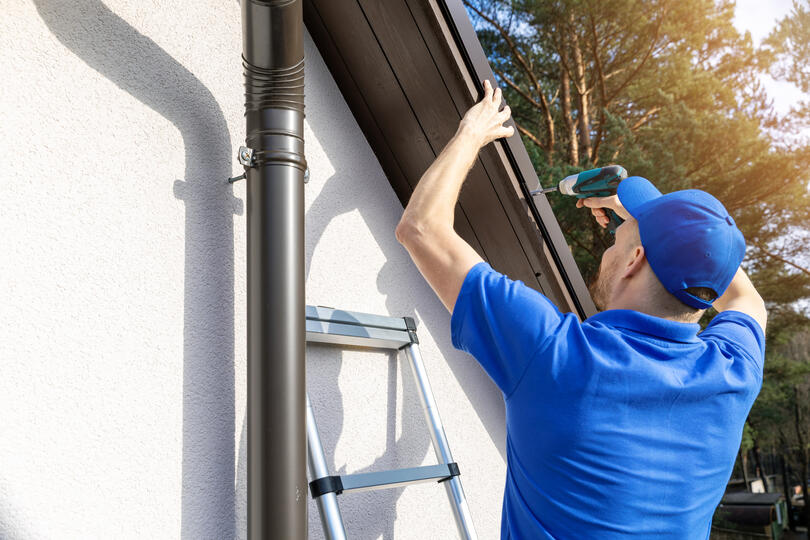
5. Secure the Drip Edge
Finally, double-check that all sections of the drip edge are securely nailed in place. Inspect for any gaps or loose sections that could allow water to infiltrate. Ensuring a tight installation is key to protecting your roof and extending its lifespan.
🚫 Common Mistakes to Avoid
Avoiding common mistakes when installing drip edge on your house is crucial to ensure proper water drainage and prevent damage to your roof and foundation. A well-installed drip edge can significantly extend the lifespan of your roofing materials and protect your home from moisture-related issues.
Incorrect Overlap
Ensure that the drip edge overlaps correctly at the joints. If the overlap is not adequate, it can lead to water leakage, which may not only damage the roof but also compromise the entire structure beneath it. Proper alignment at the joints is crucial for maintaining the effectiveness of the drip edge in directing water away from the roof and into the gutters.
Insufficient Nailing
Using too few nails can cause the drip edge to become loose over time, risking detachment during heavy winds or storms. To prevent this, make sure to nail the drip edge at regular intervals, ideally every 12 to 24 inches, and use corrosion-resistant nails to enhance durability. Proper nailing will ensure the drip edge remains firmly in place for years to come.
Ignoring Safety Precautions
Always prioritize safety when working on your roof. Use a sturdy ladder, ensuring it’s on level ground and positioned correctly. Wear appropriate safety gear, such as a helmet and non-slip shoes, to protect yourself from potential falls. Additionally, avoid working in unfavorable weather conditions, like high winds or rain, which can increase the risk of accidents. Taking these precautions will help ensure a safe and successful project.
💡 Maintenance Tips for Drip Edge
Maintenance of drip edges is crucial as it helps direct water away from the roof and foundation, preventing water damage and erosion. Regular inspection and upkeep ensure they function effectively, prolonging the lifespan of your roofing system.
- Regular Inspections: Periodically inspect your drip edge for any signs of damage or wear. Look for loose nails, rust, or gaps that need to be sealed.
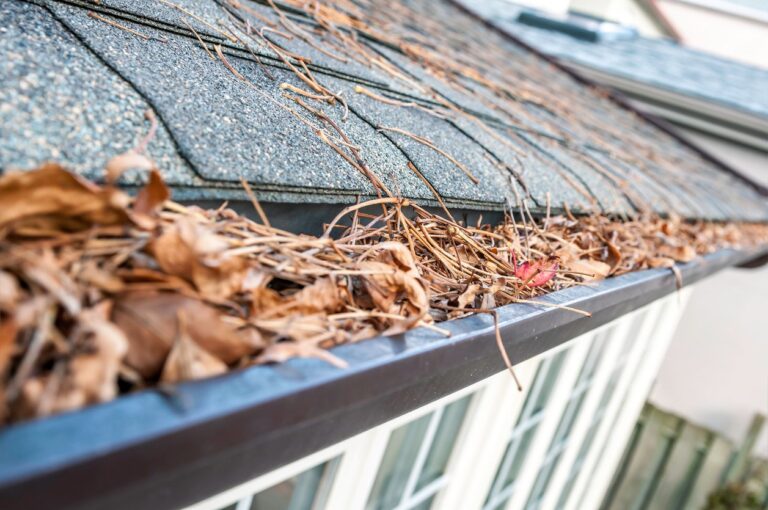
- Clean Gutters: Keep your gutters clean and free of debris to ensure proper water flow. Clogged gutters can cause water to back up and potentially damage the drip edge.
- Prompt Repairs: If you notice any issues with your drip edge, address them promptly. Timely repairs can prevent minor problems from escalating into major damage.
- Check Flashing: Inspect the flashing around the drip edge for any signs of corrosion or damage. Properly installed and maintained flashing helps direct water away from your roof and prevents leaks.
- Trim Overhanging Branches: Keep overhanging tree branches trimmed back to prevent leaves and debris from accumulating on your roof and in your gutters, which can lead to water backup.
- Inspect Roof Condition: Regularly check the condition of your roof, as issues like missing shingles or damaged underlayment can affect the effectiveness of the drip edge.
- Ensure Proper Installation: If you’re installing a new drip edge, ensure it’s done correctly. A properly installed drip edge should extend at least an inch below the roofline to effectively channel water away.
- Monitor Weather: After severe weather events, inspect your drip edge for any damage that may have occurred. Heavy rain or strong winds can displace or damage roofing components.
❓ Frequently Asked Questions
Q: Do I Really Need Drip Edge?
Yes, drip edge is essential for protecting your roof from water damage and improving its longevity. It is a small investment that can save you from costly repairs in the future.
Q: Can I Install Drip Edge Myself?
While it is possible to install drip edge yourself, it requires some roofing knowledge and skills. If you are unsure, it is best to hire a professional roofing contractor to ensure proper installation.
Q: How Often Should I Inspect My Drip Edge?
It is recommended to inspect your drip edge at least twice a year, preferably in the spring and fall. Regular inspections can help identify and address any issues before they become serious.
🙌 Protect Your Home with Expertly Installed Drip Edge from Roof X
Installing drip edge is a vital step in protecting your home from water damage and enhancing the longevity of your roof. By choosing Roof X, you’re not only selecting a team with extensive experience and expertise in roofing, but you’re also opting for quality craftsmanship and reliable service. Our dedicated professionals are committed to ensuring your roofing needs are met with precision and care, providing peace of mind for homeowners. Don’t wait until it’s too late—contact us today for a consultation and let Roof X help safeguard your home with an expertly installed drip edge.